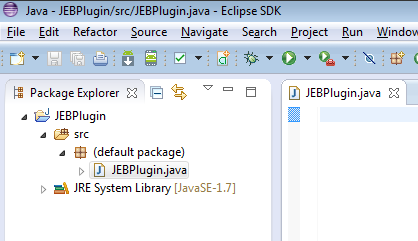
Maintenance release 1.5.201408040 introduces support for Java Archive (Jar) plugins. Unlike Java scripts/plugins, running JEB using a JDK is not required, as the Jar plugin already contains compiled code.
Jar plugins allow for complex, multi-class plugins, and referencing external libraries is easy via Manifest entries.
The plugins/ sub-directory of your JEB installation directory contains a sample JAR plugin (SamplePluginJar.jar) as well as the associated source code (SamplePluginJar-src.zip). You can use this plugin’s source code as a template for your own Jar plugins. The build.xml file is a simple Apache Ant build file used to compile source files (located in src/) and package the generated *.class files into a single Jar, with appropriate JEB-specific Manifest entries set up.
About JEB-specific Manifest entries: unlike single source (Python, Java source) plugins, that define plugin metadata with a special comment line (#? for Python, //? for Java), Jar plugins use Manifest entries prefixed by JebPlugin- to define those entries:
JebPlugin-entryclass: (mandatory) set to the class that contains the plugin entry-point
JebPlugin-name: (optional) plugin name (as it will appear in “Action / Custom Actions…” menu)
Jeb-Plugin-shortcut: (optional) keyboard shortcut
JebPlugin-help: (optional) help information
JebPlugin-author: (optional) plugin’s author information
The above values can be set up by customizing the build.xml Ant file. Also, just like stand-alone Jar files loaded by the Java VM executable, the Manifest entry Class-Path can be set to reference external Jar files or repository of *.class files. Those entries will be added to the class path when JEB loads the plugin.
Please let us know on the forum if you have any question.
JEB version 1.5.201404100 introduces new methods to the AST IElement objects, attachTag() and retrieveTag(). These methods allow an API user to tag elements of Abstract Syntax Trees. When a tagged tree is rendered (that is, when decompiled Java code is being generated), tags are processed and provided to the user alongside the decompiled code, with associated text coordinates (line, column). Within the API documentation, a “located tag” is referred to as a mark.
One example use case: Tagging nodes of an AST can be useful if the yielded source code is of specific interest, and potentially require follow-up human analysis.
The example below shows how one can navigate a Class tree, looking for specific calls to findViewById:
def processTree(e):
  if isinstance(e, Call) and e.getMethod().getName() == 'findViewById' and ... :
    print 'Tagging Call element:', e #e.getMethod().getName()
    e.attachTag('testTag', 'Calling interesting findViewById')
  if e:
    # recursively process sub-elements
    for e1 in e.getSubElements():
      processTree(e1)

sig = ...
ast = self.jeb.getDecompiledClassTree(sig)  # assume the class was decompiled
processTree(e)
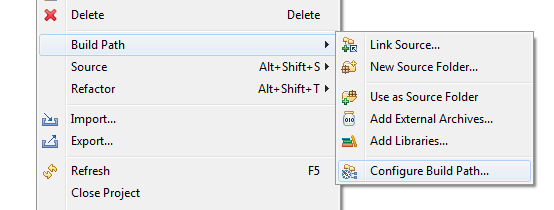
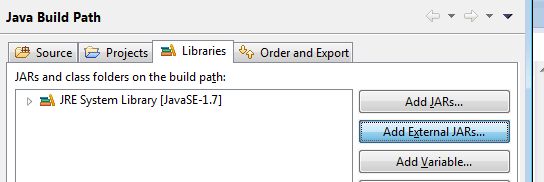
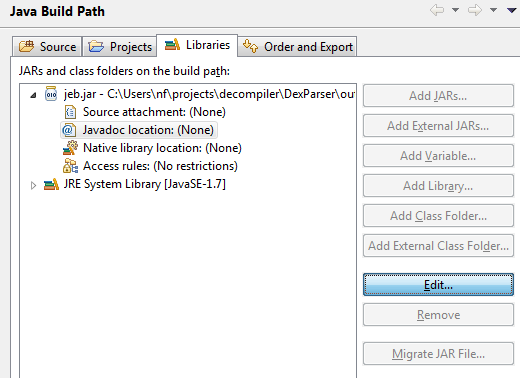
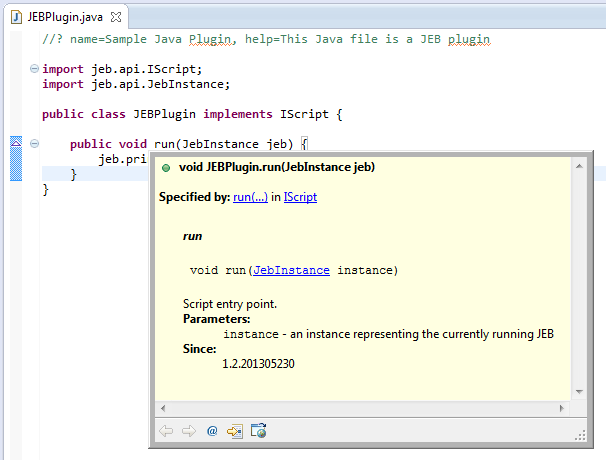
4 – You’re done! You can now develop native Java JEB plugins. Remember that the main plugin class must be in the default package (ie, no package), and implement jeb.api.IScript. This blog contains several How-to’s on plugin development. You will find even more examples on our Download section on the main website.
Reflection is a powerful feature used by interpreted languages to query information about what is currently loaded and executed by the virtual machine. Using reflection, a program can find references to classes and items within classes, and act on those items, for example, execute methods.
Combined with string encryption, reflection can seriously bloat and obscure a program, slowing down the reverse-engineering process.
Based on the above code example, it appears that a solution to remove reflection code automatically or semi-automatically is both useful and realistic. Let’s see how we can to achieve this goal using JEB’s AST API.
As said in the introduction, consider the Android trojan OBad. The video shows the use of a preliminary script to decrypt the scripts. Refer to the script ObadDecrypt.py linked above; we won’t cover the details of string decryption here, as they have been covered in a previous blog.
After string decryption, OclIIOlC.onCreate looks like the following piece of Java code:
Recursively walk the AST and check the statements Note: we could enumerate all elements instead, however, the script is intended as a demo, not an exhaustive solution to this problem
Look for Call statements (eg, foo()), or Assignments whose right part is a Call (eg, r = bar())
Check if the Call matches the following nested Call pattern: Class.forName(…).getMethod(…).invoke(…)
Note: the script does not take care of class instantiation or field access through reflection, for the same reasons stated above.
Extract the reflection information:
Fully-qualified name of the class
Method name and prototype
Invocation arguments
Create a new method, register it to the DEX object
Create a Call element that accurately mirrors the reflection calls Note: There are limitations, especially considering the return type
Finally, replace the reflection call by the direct method call
A deobfuscated / “unreflected” version of the source code above looks like:
We can now remove the try-catchall. This is what the third script is doing.
At this stage, the value and potential of the AST API package should have been clearly demonstrated. We encourage users of JEB to experiment with it, tweak our sample scripts, create their own, and eventually contribute by sending us their useful deobfuscation and/or optimization scripts. We will be happy to make them available to our user base through the Resources page.
As shown in the video, we are going to focus on a protected version of Cyanide. The strings are encrypted, and that the decompiled Java code does not look pretty:
MainActivity.鷭(x, y, z) is the decryptor method. The parameters indirectly reference a static array of bytes, that contains the encrypted strings for the class.
Our script is going to do the following:
Search the encrypted byte array
Enumerate the fields of the class
Look for a byte[] field marked private static final
Verify that this field is referenced in <clinit>, the static {…} initializer for the class
The field should also be referenced in another method: the decryptor
Check the structure of <clinit>
It should look like: encrypted_strings = new byte[]{………}
Retrieve the encrypted bytes
The decryptor was analyzed in a previous blog post
The decryptor constants need to be extracted manually (let’s keep the script simple)
Then, for every method of the class, we will:
Enumerate the statements and sub-elements of the AST recursively
Look for Call elements
If the Call matches the decryptor method, we extract the argument provided to the Call
We use these arguments to decrypt the string
Finally, we replace the Call by a newly created Constant element that represent the decrypted string
(Note: The JEB python script is just a little over 100 lines, and took less than 1 hour to write. It could be greatly improved, for instance, the decryptor constants could be found programmatically, but this added complexity is out of the scope of this introductory blog post.)
Here what the deobfuscated code snippet looks like:
This is the first post of a 3-part blogs series that will demonstrate the new features of JEB’s jeb.api.ast API package.
Classes of this package allow read and write access on the Abstract Syntax Trees (AST) of the decompiled Java code produced by JEB. In a nutshell, it allows power users to implement complex deobfuscation schemes or their own optimizations strategies.
JEB decompiles this Dalvik bytecode to the following Java code:
public TileView(Context arg5, AttributeSet arg6, int arg7) {
super(arg5, arg6, arg7);
label_3:
switch(1) {
case 0: {
goto label_3;
}
case 1: {
goto label_6;
}
}
while(true) {
switch(0) {
case 0: {
goto label_6;
}
case 1: {
goto label_3;
}
}
}
label_6:
this.b0431бб0431б0431 = new Paint();
label_8:
switch(0) {
case 0: {
goto label_11;
}
case 1: {
goto label_8;
}
}
while(true) {
switch(0) {
case 0: {
goto label_11;
}
case 1: {
goto label_8;
}
}
}
label_11:
TypedArray v0 = arg5.obtainStyledAttributes(arg6,
xkkxkk.b04310431б0431б0431);
int v1 = v0.getInt(0, 12);
label_15:
switch(0) {
case 0: {
goto label_18;
}
case 1: {
goto label_15;
}
}
while(true) {
switch(0) {
case 0: {
goto label_18;
}
case 1: {
goto label_15;
}
}
}
label_18:
switch(1) {
case 0: {
goto label_15;
}
case 1: {
goto label_21;
}
}
while(true) {
switch(1) {
case 0: {
goto label_15;
}
case 1: {
goto label_21;
}
}
}
label_21:
switch(0) {
case 0: {
goto label_24;
}
case 1: {
goto label_15;
}
}
while(true) {
switch(1) {
case 0: {
goto label_15;
}
case 1: {
goto label_24;
}
}
}
label_24:
TileView.bб0431ббб0431 = v1;
v0.recycle();
}
As one can see, dummy switches as well as pseudo-infinite loops have been inserted within the original Java code, in order to produce flow obfuscation. Using the AST API, we’re going to implement a JEB plugin that cleans the obfuscated code.
A dummy switch construct looks like the following:
switch(X) {
case X:
goto next;
case Y:
goto label_fake1:
case Z:
goto label_fake2:
}
...
next:
The above piece of code is equivalent to:
goto next;
...
next:
Which can be reduced to a single label:
next:
In order to find the dummy switches, the JEB script is going to do the following:
Recursively enumerate the statements of a method body, looking for SwitchStm elements
Check that the switch is a dummy switch:
The switched expression must be a Constant
The case block associated with that constant must start with a Goto statement
Replace the switch by the goto
Find the first Label that follows the (now replaced) switch
If a label is found, is at the same block level as the switch, and is the label pointed to by the goto that replaced the switch, then all the expressions between the goto and the label can be discarded
Finally, apply standard JEB optimizations that remove the remaining useless gotos and labels
This algorithm fits in a less than a 100-line Python script. Download the script, experiment with it, and get accustomed to the API.
The cleaned-up code is this very simple, more readable method:
public TileView(Context arg5, AttributeSet arg6, int arg7) {
super(arg5, arg6, arg7);
this.b0431бб0431б0431 = new Paint();
TypedArray v0 = arg5.obtainStyledAttributes(arg6,
xkkxkk.b04310431б0431б0431);
int v1 = v0.getInt(0, 12);
TileView.bб0431ббб0431 = v1;
v0.recycle();
}
In Part Deux, we will show how the AST API can be leveraged to decrypt encrypted strings of a protected piece of code.
The API that shipped with JEB 1.3 allows direct access to the Android Manifest. Here, we are just demonstrating how some of the new methods that shipped with the API. This plugin allows a user to jump from an Activity tag in the manifest to the corresponding code in the Assembly view:
#? name=Jump to an Activity, shortcut=Ctrl+Shift+J

from jeb.api import IScript
from jeb.api.ui import View
from jeb.api.ui import CodePosition


class JumpToActivity(IScript):

  def run(self, jeb):

    # basic requirements
    ui = jeb.getUI()
    if not ui:
      return

    if jeb.getApiVersion() < 2:
      print 'Please upgrade to JEB 1.3'
      return

    ui.focusView(View.Type.MANIFEST)
    v = ui.getView(View.Type.MANIFEST)
    if not v:
      print 'No Manifest'
      return

    # whole copy of the Manifest
    text = v.getText()

    # retrieve the package name
    pname = ''
    pos = text.find('package="')
    if pos >= 0:
      pos += 9
      pos1 = text.find('"', pos)
      if pos1 >= 0:
        pname = text[pos:pos1]

    # the Activity name should be the on-caret item
    aname = v.getActiveItem()
    if not aname:
      print 'Please position the caret on the Activity name'
      return

    # absolute class classname
    if aname.startswith('.'):
      if not pname:
        print 'Package name not found'
        return
      aname = pname + aname

    ui.focusView(View.Type.ASSEMBLY)
    a = ui.getView(View.Type.ASSEMBLY)
    if not a:
      print 'No Assembly view'
      return

    # internal class name
    classname = 'L' + aname.replace('.', '/') + ';'
    if not a.setCodePosition(CodePosition(classname)):
      print 'Class not found: '+aname
      ui.focusView(View.Type.MANIFEST)
Feel free to experiment with the script, and customize it to your needs. Leave a comment if you have any questions. More sample scripts will be posted in the next week to showcase more other capabilities of API v2.