JEB 3.3 ships with our internal tool SiglibGen to generate signatures for native routines. Until now, users could sign individual routines only from JEB user interface (menu Native> Create Signature for Procedure), or with the auto-signing mode.
With the release of SiglibGen, users can now create signatures for whole files in batch mode, notably executables (PE, ELF) libraries (Microsoft COFF and AR files) and JDB2 (JEB project files)1.
In this post, we will explain how SiglibGen allows power-users to generate custom signature libraries, in order to quickly identify similar code between different executables.
Signature Libraries (siglibs)
Signature libraries are stored in <JEB install folder>/siglibs folder. Each signature contains a set of features identifying a routine (detailed below), and a set of attributes representing the knowledge about the routine (name, internal labels, comments…).
JEB currently ships with signature libraries for x86/x64 Microsoft Visual Studio libraries (from Visual Studio 2008 to 2017), and for ARM/ARM64 Android NDKs (from NDKr10 to NDKr19). These signatures will be automatically loaded when a suitable file is opened (see File>Engines>Signature Libraries for the complete list of available signature libraries).
These compiler signatures are intended to be “false positive free”, i.e. they should only identify the exact same routine (though it can be mapped at a different location). Therefore, the signatures can be blindly trusted by users, and by JEB automatic analysis2.
But users might want to generate their own signature libraries, for example in the following scenarios:
- User analyzed an unknown executable. The resulting JDB2 file can then be signed, such that all routines can be identified in others executables and related information (name, comments, labels) be imported.
- User found out that an executable is statically linked with a public library. The library can then be compiled with symbols and signed such that the library routines will be renamed in the analyzed executable3.
Use Case: Operation ShadowHammer
To illustrate the signatures generation process, we are going to use the recent attack dubbed “Operation ShadowHammer” as an example. This operation was originally documented by Kaspersky. Roughly summarized, malicious code was inserted into a legitimate ASUS’s automatic update tool named “ASUS Live Update Utility” 4 .
In this use case, we are going to put ourselves in the shoes of an analyst willing to understand the trojanized ASUS installers. We do not intend to analyze them in-depth – it has been done several times already -, but rather show how SiglibGen can accelerate the analysis.
At first, we got our hands on three samples, originally mentioned in CounterCept’s analysis with their date of use:
| SHA-256 | Date Of Use |
6aedfef62e7a8ab7b8ab3ff57708a55afa1a2a6765f86d581bc99c738a68fc74 | June |
736bda643291c6d2785ebd0c7be1c31568e7fa2cfcabff3bd76e67039b71d0a8 | September |
9a72f971944fcb7a143017bc5c6c2db913bbb59f923110198ebd5a78809ea5fc | October |
Oldest Sample
Quick Analysis
An analyst would likely start looking at the oldest sample (6aedfef6…), in order to investigate possible evolution of the attack. In this sample, the installer’s main() routine was modified to load a malicious PE executable from its resources:
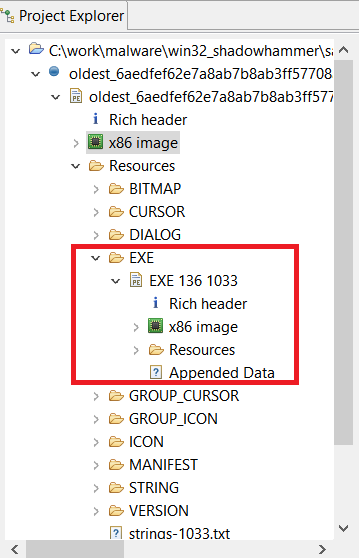
Here is the memory map after opening the malicious executable in JEB:

The large chunks of cyan correspond to routines identified as being part of “Microsoft Visual C++ 2010 /MT” libraries. Then, we analyzed the remaining seven routines (the blue chunk in the navigation view), and renamed them as follow:
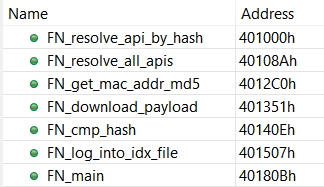
These routines implement the following logic: check if one of the machine’s MAC address match a hard coded list, and if it’s the case download a payload (otherwise a .idx log file is dropped).
Now in order to re-use this knowledge on more recent trojanized ASUS installers, let’s generate signatures for this first sample.
Generating Signatures
In order to sign the analyzed file, we are going to create a configuration file from the sample file provided in <JEB install folder>/siglibs/custom:
;------------------------------------------------------------------------------
; *** SAMPLE *** JEB Signature Library configuration file
;------------------------------------------------------------------------------

;template file used to configure the generation of a *.siglib file for JEB

;how to generate the siglib specified by this file?
;open a terminal and execute: (eg, on Windows)
;  $ ..\..\jeb_wincon.bat -c --siglibgen=sample-siglib.cfg

;(mandatory) name of the folder containing files to sign
; must be in the same folder as this configuration file
input_folder_name=

;(mandatory) processor type
; see com.pnfsoftware.jeb.core.units.codeobject.ProcessorType
; eg: X86, X86_64, ARM, ARM64, MIPS, MIPS64
processor=

;(mandatory) output siglib file name
; '.siglib' extension will be appended to it
; IMPORTANT! once generated, this file must be moved to the <JEB>/siglibs/ folder
; (user generated siglibs have to be manually loaded)
output_file_name=mysiglib

;(mandatory) unique identifier for your siglib
; keep it < 0 and decrement for each package you generate
uuid=-1

;(mandatory) *absolute* path to JEB typelibs folder, usually <JEB>/typelibs
typelibs_folder=

;(mandatory) name of your package
; e.g. 'Microsoft Visual C++ 2008 signatures' (without '')
package_name=

;(mandatory) package version
package_version=0

;(optional) description of your package
package_description=

;(optional) package author
package_author=

;(mandatory) list of features included in each signature
; i.e. the characteristics of the signed routines serving to identify them
; see com.pnfsoftware.jeb.core.units.code.asm.sig.NativeFeatureSignerID
; note: defaults should be suitable for most cases. ROUTINE_SIZE must always be included.
features=ROUTINE_SIZE,ROUTINE_CODE_HASH,CALLED_ROUTINE_NAME_ONLY_EXTERN

;(mandatory) list of attributes included in each signature
; i.e. additional knowledge on the signed routines conveyed by signatures
; (other than routine name)
; see com.pnfsoftware.jeb.core.units.code.asm.sig.NativeAttributeSignerID
attributes=COMMENT,LABEL
A particularly interesting part of this configuration is the features field, where users can select the characteristics of the routine they want to put in signatures. The complete feature list can be found here; here are the features we included in our case (the default ones):
| Feature Name | Description |
| ROUTINE_SIZE | Size of the routine (number of instructions). |
| ROUTINE_CODE_HASH | Custom hash computed from the routine assembly code. |
| CALLED_ROUTINE_NAME_ONLY_EXTERN | Names of the external routines called by the signed routine. |
Note that by including ROUTINE_CODE_HASH, our signatures will only match routines with the exact same code (but possibly mapped at a different location). The use of
CALLED_ROUTINE_NAME_ONLY_EXTERN allows to distinguish different wrapper routines calling different API routines, but having the same code.
Here is the specific configuration file shadowhammer-oldest.cfg we made for this first sample:
input_folder_name=input
processor=X86
output_file_name=shadowhammer-6aedfef6
uuid=-1
typelibs_folder=[...REDACTED...]\typelibs
package_name=ShadowHammer -- sample 6aedfef6 (oldest)
package_version=0
package_description=Signatures generated from the analysis of the oldest sample known
package_author=Joan Calvet
features=ROUTINE_SIZE,ROUTINE_CODE_HASH,CALLED_ROUTINE_NAME_ONLY_EXTERN
attributes=COMMENT,LABEL
Then we put the JDB2 file of the analyzed sample into the input folder (see configuration’s input_folder_name field). SiglibGen can then be called by executing JEB startup script (e.g. jeb_wincon.bat) with the following flags:
$jeb -c --siglibgen=shadowhammer-oldest.cfgThe generated signature libraries will then be written in the output folder. In our case, SiglibGen signed our seven routines, as indicated in siggen_stat.log file 6:
> Package created on 2019.05.01.15.29.23
> metadata: X86/ShadowHammer -- sample 6aedfef6 (oldest)/0/Signatures generated from the analysis of the oldest sample known/Joan Calvet/1556738959
> # sigs created: 7
> # very small routines: 0
> # small routines: 0
> # medium routines: 6
> # large routines: 1
> # unnamed routines: 1
> # blacklisted routines: 0
> # duplicated routines: 0
We can now copy shadowhammer-6aedfef6.siglib to <JEB>/siglibs/ folder. It will now be available under File>Engines>Signature Libraries to be manually loaded.
Second Sample Analysis
Now, it is time to turn to the second sample (736bda6432…). The workflow is quite different from the previous one: a routine call has been inserted into Visual Studio library method __crtExitProcess, which is called whenever the program exists:
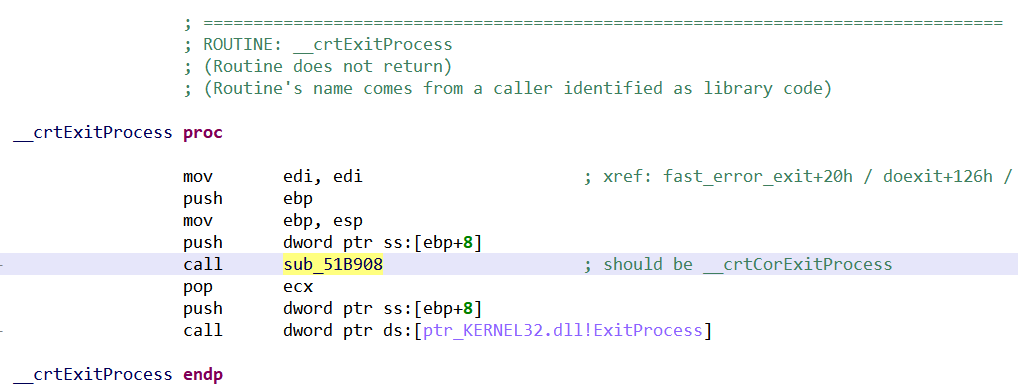
The astute reader might wonder why the routine is still named __crtExitProcess(), as if it was the original one, if one of its call has been rewritten to point elsewhere. In this case, the routine’s name comes from the fact that several caller routines were identified as library code (and are known to call __crtExitProcess()), as indicated by the routine header comment “Routine’s name comes from a caller […]”.
Following the dubious call, we end up decrypting the malicious payload, which is then executed. We can load the malicious dump in JEB with the x86 processor and the correct base address. After manually defining the code area, we obtain the following navigation view:

For now, no compiler signature libraries were loaded because it is a memory dump without a proper PE header. As we know the previous malicious sample was compiled with Visual Studio 2010 /MT libraries, we can manually load the corresponding signatures (File>Engines>Signature Libraries). Here is the navigation bar at this time:

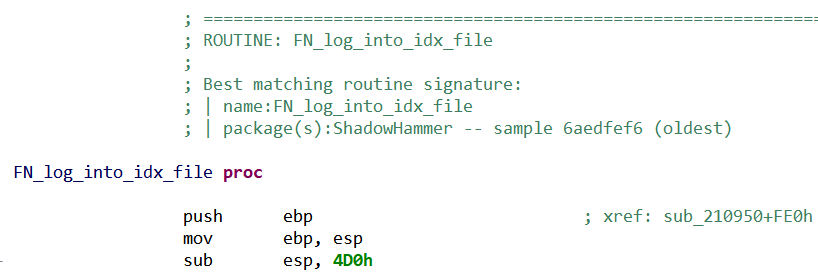
Most of the code has been identified. Now, we can load the custom signatures we generated from the previous sample, and we end up with two more routines being identified (i.e. miscreants directly re-used them from the first sample):
We can now look at the non-identified routines, without having to reanalyze the duplicates.
Finally, after having analyzed the remaining routines, we can generate a new signature library, following the same steps previously described. This time we put two samples in the input folder (the trojanized installer’s JDB2, and the memory dump’s JDB2). Eight routines are then signed.
Third Sample Analysis
The most recent sample (9a72f971944f…) follows the same logic as the previous one, namely it dynamically decrypts the malicious code, which is then executed. As previously, we load the memory dump in JEB with Visual Studio 2010 /MT signatures:

Finally, we load the ShadowHammer signature libraries generated from the previous two samples:

Visual Studio 2010 /MT and ShadowHammer signature libraries loaded.
At this point, only one malicious routine has not been identified (the large blue area in the navigation view). We can now focus on it, knowing that the rest of the code is the same.
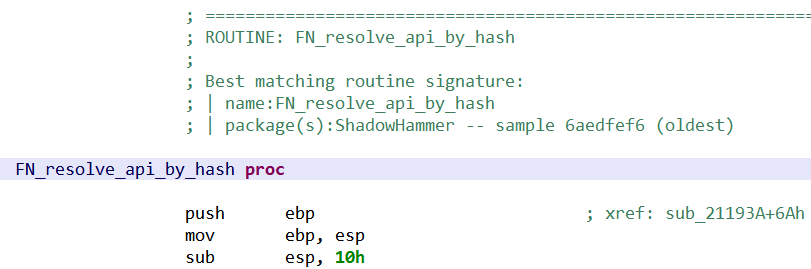
If we open the two binaries side-by-side, we can rapidly pinpoint that the unidentified routine has indeed been modified between the two samples. For example:
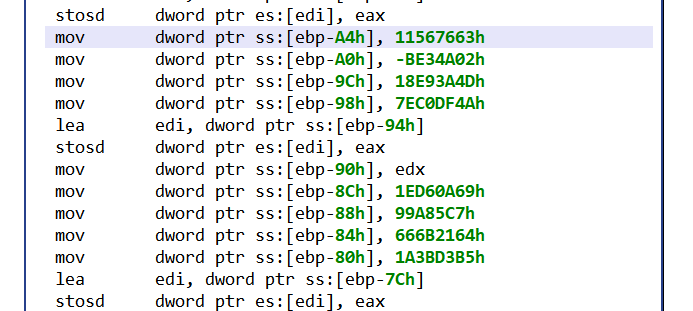
Sample 736bda643291c 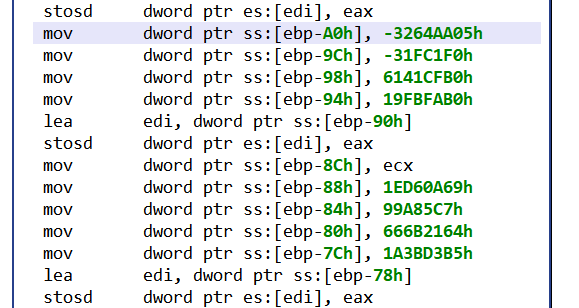
Sample 9a72f971944fc
It appears the hardcoded list of searched MAC addresses (represented by their MD5 hashes) has been modified between the two samples.
Conclusion
We hope this blog post demonstrated how SiglibGen allows users to speed up their analysis by easily re-using their work. Remember that signatures can be generated in a lighter manner directly from JEB UI (as shown in the auto-signing mode video). As usual, do not hesitate to contact us if you have any questions (email, Twitter, Slack).
Note: SiglibGen might set .parsers.*.AnalysisStyle and .parsers.*.AllowAdvancedAnalysis engines option to specific values suitable for signatures generation, without restoring the original values after the generation. For now, JEB power-users have to manually restore these two engines options to the intended values after having generated signatures (menu Edit>Options>Engines). This will be fixed in next release JEB 3.4.
Annex: SiglibGen Log Files
A typical SiglibGen run will produce several log files (in the same folder):
| File Name | Purpose |
| siggen_stat.log | Summary log (number of signatures created, etc). A new entry is appended to the log file at each signature generation. |
| siggen_report.html | Complete HTML log file; each signed routine is shown with the corresponding features and attributes. |
| conflicts.txt | Conflict resolution file; users can tweak here the decisions taken when several routines have the same features (and then regenerate the signatures). |
| removals.txt | Removals resolution file; users can tweak here the automatic decisions regarding removing certain signatures (and then regenerate the signatures) . |
- More formats could be handled, do not hesitate to contact us if you have such needs. ↩
- While the signatures shown in this blog post will also be generated in a false positive free manner, SiglibGen allows to build more flexible signatures; this will the topic of another blog post. ↩
- If signatures were built to be strict (i.e. not allowing any modifications to the original routine), this can be far from trivial, as the library needs to be compiled with the exact same options as the analyzed executable. ↩
- There are numerous excellent analysis available for Operation ShadowHammer, like the one from CounterCept. ↩
- Note that thanks to JEB recursive processing, the embedded executable does not need to be extracted, and can be directly analyzed within the original JEB’s project ↩
- See Annex for a description of all log files produced by SiglibGen. ↩
What should we do To quickly, easily, and securely generate a signature for the Web SDK?